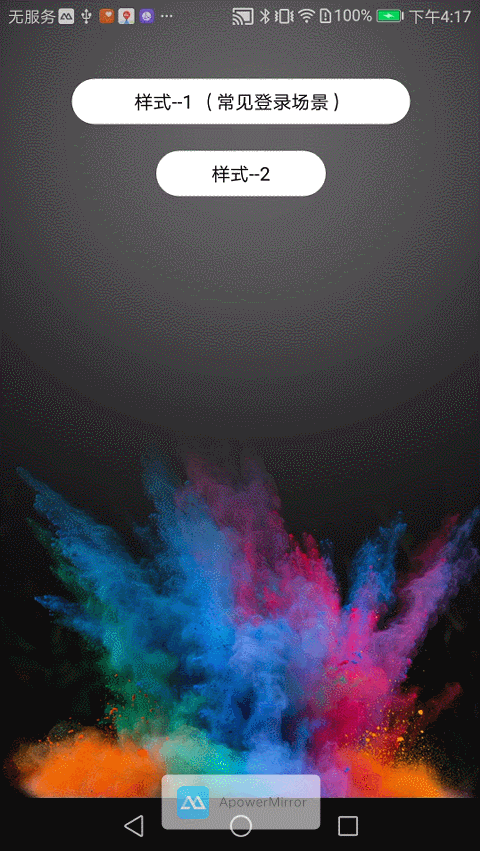
1、登录效果展现
2、关注效果展现
画图首先是onDraw方法(我会把圆代码写上,一步一步剖析): 首先在view中定义个属性:private RectF rectf = new RectF();//可以了解为,装载控件按钮的区域
rectf.left = current_left;rectf.top = 0; //(这2点确定空间区域左上角,current_left,是为了后面动画矩形变成等边矩形准备的,这里你可以看成0) rectf.right = width - current_left; rectf.bottom = height; //(通过改变current_left大小,升级绘制,就会实现了动画效果)//画圆角矩形 //参数1:区域//参数2,3:圆角矩形的圆角,其实就是矩形圆角的半径//参数4:画笔canvas.drawRoundRect(rectf, circleAngle, circleAngle, paint);上面是画圆角,那width和height怎样来呢当然是通过onMeasure;
@Overrideprotected void onMeasure(int widthMeasureSpec, int heightMeasureSpec) { height = measuredHeight(heightMeasureSpec); //这里是测量控件大小 width = measureWidth(widthMeasureSpec); //我们经常可以看到我们设置控件wrap_content,match_content或者者固定值 setMeasuredDimension(width, height);}下面以measureWidth为例:
private int measureWidth(int widthMeasureSpec) { int result; int specMode = MeasureSpec.getMode(widthMeasureSpec); int specSize = MeasureSpec.getSize(widthMeasureSpec); //这里是精准模式,比方match_content,或者者是你控件里写明了控件大小 if (specMode == MeasureSpec.EXACTLY) { result = specSize; } else { //这里是wrap_content模式,其实这里就是给一个默认值 //下面这段注销代码是最开始假如客户不设置大小,给他一个默认固定值。这里以字体长度来决定更正当 //result = (int) getContext().getResources().getDimension(R.dimen.dp_150); //这里是我设置的长度,当然你写自己设置控件可以设置你想要的逻辑,根据你的实际情况 result = buttonString.length() * textSize + height * 5 / 3; if (specMode == MeasureSpec.AT_MOST) { result = Math.min(result, specSize); } } return result; }这里我是用自己的方式实现:当文字长度超过控件长度时,文字需要来回滚动。所以自己设置控件由于你需要什么样的功能可以自己去实现(当然这个方法也是在onDraw里,为什么这么个顺序讲,目的希望我希望你能循序渐进的了解,假如你觉得onDraw方代码太杂,你可以用个方法独立出去,你可以跟作者一样用private void drawText(Canvas canvas) {}), //绘制文字的路径(文字过长时,文字来回滚动需要用到)
private Path textPath = new Path():
textRect.left = 0;textRect.top = 0;textRect.right = width;textRect.bottom = height; //这里确定文字绘制区域,其实就是控件区域Paint.FontMetricsInt fontMetrics = textPaint.getFontMetricsInt();//这里是获取文字绘制的y轴位置,可以了解上下居中int baseline = (textRect.bottom + textRect.top - fontMetrics.bottom - fontMetrics.top) / 2;//这里判断文字长度能否大于控件长度,当然我控件2边需要留文字的间距,所以不是大于width,这么说只是更好的了解//这里是当文字内容大于控件长度,启动回滚效果。建议先看下面else里的正常情况if ((buttonString.length() * textSize) > (width - height * 5 / 3)) { textPath.reset(); //由于要留2遍间距,以heigh/3为间距 textPath.moveTo(height / 3, baseline); textPath.lineTo(width - height / 3, baseline); //这里的意思是文字从哪里开始写,可以是居中,这里是右边 textPaint.setTextAlign(Paint.Align.RIGHT); //这里是以路径绘制文字,scrollSize可以了解为文字在x轴上的便宜量,同时,我的混动效果就是通过改变scrollSize //刷新绘制来实现 canvas.drawTextOnPath(buttonString, textPath, scrollSize, 0, textPaint); if (isShowLongText) { //这里是绘制遮挡物,由于绘制路径没有间距这方法,所以绘制遮挡物相似于间距方式 canvas.drawRect(new Rect(width - height / 2 - textSize / 3, 0, width - height / 2, height),paintOval); canvas.drawRect(new Rect(height / 2, 0, height / 2 + textSize / 3, height), paintOval); //这里有个bug 有个小点-5 因画笔粗细产生 canvas.drawArc(new RectF(width - height, 0, width - 5, height), -90, 180, true, paintOval); canvas.drawArc(new RectF(0, 0, height, height), 90, 180, true, paintOval); } if (animator_text_scroll == null) { //这里是计算混到最右边和最左边的距离范围 animator_text_scroll = ValueAnimator.ofInt(buttonString.length() * textSize - width + height * 2 / 3,-textSize); //这里是动画的时间,scrollSpeed可以了解为每个文字滚动控件外所需的时间,可以做成控件属性提供出去 animator_text_scroll.setDuration(buttonString.length() * scrollSpeed); //设置动画的模式,这里是来回滚动 animator_text_scroll.setRepeatMode(ValueAnimator.REVERSE); //设置插值器,让整个动画流畅 animator_text_scroll.setInterpolator(new LinearInterpolator()); //这里是滚动次数,-1无限滚动 animator_text_scroll.setRepeatCount(-1); animator_text_scroll.addUpdateListener(new ValueAnimator.AnimatorUpdateListener() { @Override public void onAnimationUpdate(ValueAnimator animation) { //改变文字路径x轴的偏移量 scrollSize = (int) animation.getAnimatedValue(); postInvalidate(); } }); animator_text_scroll.start(); }} else { //这里是正常情况,isShowLongText,是我在启动控件动画的时候,能否启动 文字有渐变效果的标识, //假如是长文字,启动渐变效果的话,假如控件变小,文字内容在当前控件外,会显得很难看,所以根据这个标识,关闭,这里你可以先忽略(同时由于根据路径绘制text不能有间距效果,这个标识还是判断能否在控件2遍绘制遮挡物,这是作者的处理方式,假如你有更好的方式可以在下方留言) isShowLongText = false; /** * 简单的绘制文字,没有考虑文字长度超过控件长度 * */ //这里是居中显示 textPaint.setTextAlign(Paint.Align.CENTER); //参数1:文字 //参数2,3:绘制文字的中心点 //参数4:画笔 canvas.drawText(buttonString, textRect.centerX(), baseline, textPaint);}<?xml version="1.0" encoding="utf-8"?><resources> <declare-styleable name="SmartLoadingView"> <attr name="textStr" format="string" /> <attr name="errorStr" format="string" /> <attr name="cannotclickBg" format="color" /> <attr name="errorBg" format="color" /> <attr name="normalBg" format="color" /> <attr name="cornerRaius" format="dimension" /> <attr name="textColor" format="color" /> <attr name="textSize" format="dimension" /> <attr name="scrollSpeed" format="integer" /> </declare-styleable></resources>这里以,文案为例, textStr。比方你再布局种用到app:txtStr="文案内容"。在自己设置控件里获取如下:
public SmartLoadingView(Context context, AttributeSet attrs, int defStyleAttr) { super(context, attrs, defStyleAttr); //自己设置控件的3参方法的attrs就是我们设置自己设置属性的关键 //比方我们再attrs.xml里自己设置了我们的属性, TypedArray typedArray = getContext().obtainStyledAttributes(attrs, R.styleable.SmartLoadingView); //这里是获取客户有没有设置整个属性 //这里是从客户那里获取有没有设置文案 String title = typedArray.getString(R.styleable.SmartLoadingView_textStr); if (TextUtils.isEmpty(title)){ //假如获取来的属性是空,那么可以默认一个属性 //(作者不记得设置了!由于已经发布后期优化,老尴尬了) buttonString ="默认文案"; }else{ //假如有设置文案 buttonString = title; }}为了点击事件的直观,也可以把解决防止重复点击事件封装在里面
//这是我自己设置登录点击的接口public interface LoginClickListener { void click();}public void setLoginClickListener(final LoginClickListener loginClickListener) { this.setOnClickListener(new OnClickListener() { @Override public void onClick(View v) { if (loginClickListener != null) { //防止重复点击 if (!isAnimRuning) { start(); loginClickListener.click(); } } } });}矩形到正方形(为了简化,我把源码少量其余属性去掉了,这样方便了解)
//其中 default_all_distance = (w - h) / 2;除以2是由于2遍都往中间缩短private void set_rect_to_circle_animation() { //这是一个属性动画,current_left 会在duration时间内,从0到default_all_distance匀速变化 //想增加多样化的话 还可以加入插值器。 animator_rect_to_square = ValueAnimator.ofInt(0, default_all_distance); animator_rect_to_square.setDuration(duration); animator_rect_to_square.addUpdateListener(new ValueAnimator.AnimatorUpdateListener() { @Override public void onAnimationUpdate(ValueAnimator animation) { //这里的current_left跟onDraw相关,还记得吗 //onDraw里的控件区域 //控件左边区域 rectf.left = current_left; //控件右边区域 rectf.right = width - current_left; current_left = (int) animation.getAnimatedValue(); //刷新绘制 invalidate(); } });矩形到圆角矩形。就是从一个没有圆角的变成完全圆角的矩形,当然我展现的时候只有第三个图,最后一个按钮才显著了。
其余的我直接设置成了圆角按钮,由于我把圆角做成了一个属性。
还记得onDraw里的canvas.drawRoundRect(rectf, circleAngle, circleAngle, paint);circleAngle就是圆角的半径
可以想象一下假如全是圆角,那么circleAngle会是多少,当然是height/2;没错吧,所以
由于我把圆角做成了属性obtainCircleAngle是从xml文件获取的属性,假如不设置,则为0,就没有任何圆角效果
animator_rect_to_angle = ValueAnimator.ofInt(obtainCircleAngle, height / 2);animator_rect_to_angle.setDuration(duration);animator_rect_to_angle.addUpdateListener(new ValueAnimator.AnimatorUpdateListener() { @Override public void onAnimationUpdate(ValueAnimator animation) { //这里试想下假如是一个正方形,恰好是圆形的圆角,那就是一个圆 circleAngle = (int) animation.getAnimatedValue(); //刷新绘画 invalidate(); }});2个属性动画做好后,用 private AnimatorSet animatorSet = new AnimatorSet();把属性动画加进去,可以设置2个动画同时进行,还是先后顺序 这里是同时进行所用用with
animatorSet .play(animator_rect_to_square).with(animator_rect_to_angle);这里就是画圆弧,只是不断改变,圆弧的起始点和终点,最终呈现loading状态,也是在onDraw里
//绘制加载进度if (isLoading) { //参数1:绘制圆弧区域 //参数2,3:绘制圆弧起始点和终点 canvas.drawArc(new RectF(width / 2 - height / 2 + height / 4, height / 4, width / 2 + height / 2 - height / 4, height / 2 + height / 2 - height / 4), startAngle, progAngle, false, okPaint); //这里是我通过实践,实现最佳loading动画 //当然这里有很多方式,由于我自己设置这个view想把所有东西都放在这个类里面,你也可以有你的方式 //假如有更好的方式,欢迎留言,告知我一下 startAngle += 6; if (progAngle >= 270) { progAngle -= 2; isAdd = false; } else if (progAngle <= 45) { progAngle += 6; isAdd = true; } else { if (isAdd) { progAngle += 6; } else { progAngle -= 2; } } //刷新绘制,这里不用担心有那么多刷新绘制,会不会影响性能 // postInvalidate();}那么这里首先要把loading动画取消,那么直接改变isLoading=false;不会只它同时启动打勾动画;打勾动画的动画,这里比较麻烦,也是我在别人自己设置动画里学习的,通过PathMeasure,实现路径动画
/** * 路径--用来获取对勾的路径 */private Path path = new Path();/** * 取路径的长度 */private PathMeasure pathMeasure;//初始化打勾动画路径;private void initOk() { //对勾的路径 path.moveTo(default_all_distance + height / 8 * 3, height / 2); path.lineTo(default_all_distance + height / 2, height / 5 * 3); path.lineTo(default_all_distance + height / 3 * 2, height / 5 * 2); pathMeasure = new PathMeasure(path, true);}//初始化打勾动画private void set_draw_ok_animation() { animator_draw_ok = ValueAnimator.ofFloat(1, 0); animator_draw_ok.setDuration(duration); animator_draw_ok.addUpdateListener(new ValueAnimator.AnimatorUpdateListener() { @Override public void onAnimationUpdate(ValueAnimator animation) { startDrawOk = true; isLoading = false; float value = (Float) animation.getAnimatedValue(); effect = new DashPathEffect(new float[]{pathMeasure.getLength(), pathMeasure.getLength()}, value * pathMeasure.getLength()); okPaint.setPathEffect(effect); invalidate(); } });}//启动打勾动画只要要调用animator_draw_ok.start();onDraw里绘制打勾动画
//绘制打勾,这是onDraw的,startDrawOk是判断能否开启打勾动画的标识if (startDrawOk) { canvas.drawPath(path, okPaint);}之前6.1提到了矩形到圆角矩形和矩形到正方形的动画,
那么这里只是前面2个动画反过来,再加上联网失败的文案,和联网失败的背景图即刻
这里我通过loginSuccess里参数的类型启动不同效果:
1、启动扩散全屏动画public void loginSuccess(Animator.AnimatorListener endListener) {}2、启动打勾动画public void loginSuccess(AnimationOKListener animationOKListener) {}启动扩散全屏是本文的重点,里面还涉及到了一个自己设置view
CirclBigView,这个控件是全屏的,而且是从一个小圆不断改变半径变成大圆的动画,那么有人会问,全屏一定不好啊,会影响布局,但是这里,我把它放在了activity的视图层:ViewGroup activityDecorView = (ViewGroup) ((Activity) getContext()).getWindow().getDecorView();ViewGroup.LayoutParams layoutParams = new ViewGroup.LayoutParams(ViewGroup.LayoutParams.MATCH_PARENT, ViewGroup.LayoutParams.MATCH_PARENT);activityDecorView.addView(circlBigView, layoutParams);这个灵感也是前不久在学习微信,拖拽退出的思路里发现的。一律代码如下:
public void toBigCircle(Animator.AnimatorListener endListener) { //把缩小到圆的半径,告诉circlBigView circlBigView.setRadius(this.getMeasuredHeight() / 2); //把当前背景颜色告诉circlBigView circlBigView.setColorBg(normal_color); int[] location = new int[2]; //测量当前控件所在的屏幕坐标x,y this.getLocationOnScreen(location); //把当前坐标告诉circlBigView,同时circlBigView会计算当前点,到屏幕4个点的最大距离,即是当前控件要扩散到的半径 //具体建议读者看完本博客后,去下载玩耍下。 circlBigView.setXY(location[0] + this.getMeasuredWidth() / 2, location[1]); if (circlBigView.getParent() == null) { ViewGroup activityDecorView = (ViewGroup) ((Activity) getContext()).getWindow().getDecorView(); ViewGroup.LayoutParams layoutParams = new ViewGroup.LayoutParams(ViewGroup.LayoutParams.MATCH_PARENT, ViewGroup.LayoutParams.MATCH_PARENT); activityDecorView.addView(circlBigView, layoutParams); } circlBigView.startShowAni(endListener); isAnimRuning = false;}由于项目是把之前的功能写成了控件,所以有很多地方不完善。希望有建议的大牛和小伙伴,提醒提醒我,让我完善的更好。谢谢
希望读到这的您能转发分享和关注一下我,以后还会分享Android知识点及解析,您的支持就是我最大的动力!!