
官网最新版本宣传图
导读:VMWARE与CENTOS安装好之后,现在开始安装MYSQL。假如不知道怎样安装,可阅读以下文章:
1.VMWARE下载与安装及创立LINUX虚拟机:https://www.toutiao.com/i6604600337120625155/
2.CENTOS下载及安装:https://www.toutiao.com/i6604947692135121412/
3.FINALSHELL连接LINUX:https://www.toutiao.com/i6605371955082166798/
安装步骤:下载RPM资源-->安装RPM-->安装MYSQL-->配置MYSQL-->防火墙修改
资源地址:http://repo.mysql.com/
下载RPM资源:
# wget http://repo.mysql.com/mysql57-community-release-el7-9.noarch.rpm

首页(右键查看源代码)

选择版本
安装RPM:
# rpm -ivh mysql57-community-release-el7-9.noarch.rpm
安装MYSQL:
# yum install mysql-server -y
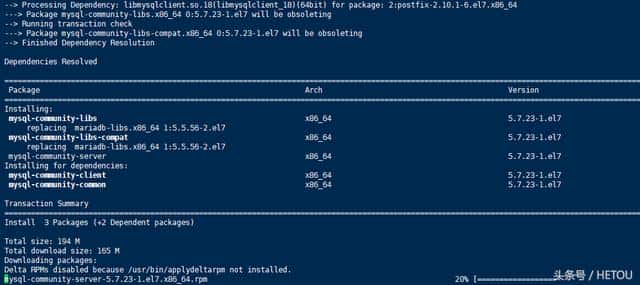
安装过程

安装完成
配置MYSQL:
# systemctl start mysqld.service
# cat /var/log/mysqld.log 或者者 # grep "password" /var/log/mysqld.log
# A temporary password is generated for root@localhost: pwyNxTTh81?v
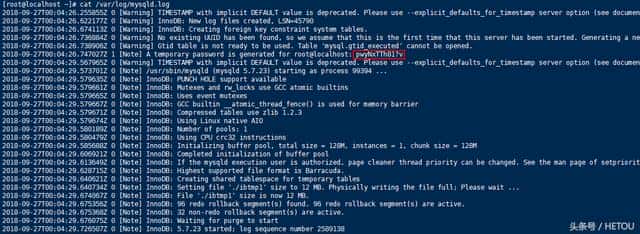
查看密码
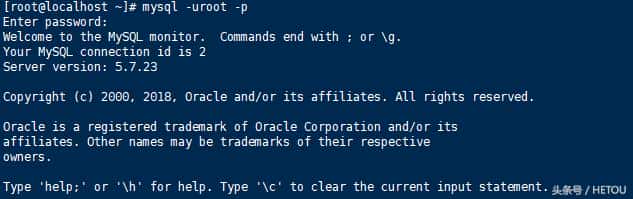
# mysql -uroot -p
# Enter password:
mysql: SET PASSWORD = PASSWORD('Hetongmysql2018.');
mysql: GRANT ALL PRIVILEGES ON *.* TO 'root'@'%' IDENTIFIED BY 'Hetongmysql2018.' WITH GRANT OPTION;FLUSH PRIVILEGES;
mysql: FLUSH PRIVILEGES;
登录MYSQL

配置
防火墙修改,将CENTOS7的FIREWALL防火墙修改为IPTABLES防火墙,依次执行以下命令:
# systemctl stop firewalld.service
# systemctl disable firewalld.service
# systemctl mask firewalld.service
# yum install iptables-services -y
# systemctl enable iptables
# systemctl start iptables
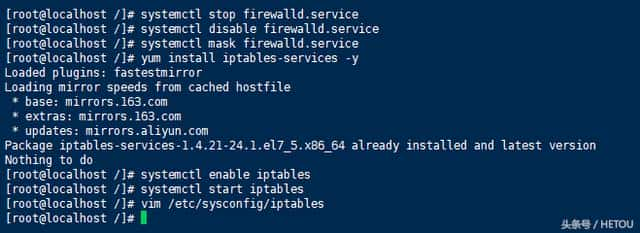
执行命令
将3306端口增加到IPTABLES配置文件:
# vim /etc/sysconfig/iptables
-A INPUT -m state --state NEW -m tcp -p tcp --dport 3306 -j ACCEPT
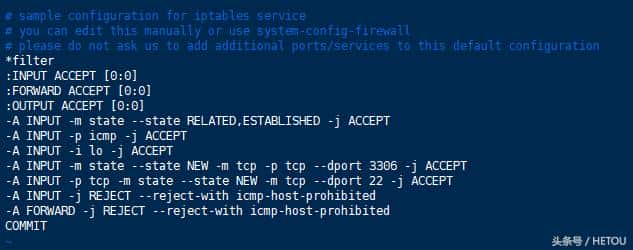
配置端口
# systemctl restart iptables.service
# systemctl enable iptables.service
至此整个完成过程完成!
